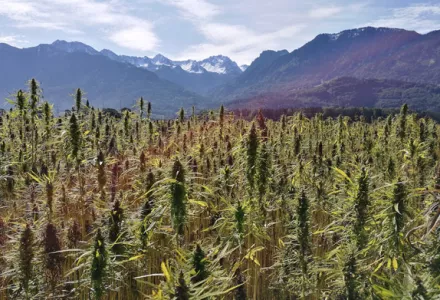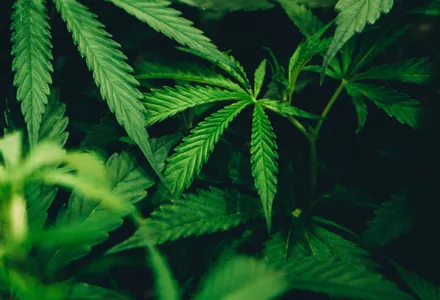
Cannabis is an annual plant that has been cultivated for thousands of years all over the world. Although the fibers, seeds and oil have always been important products, currently, it is the female flowers (buds) that make cannabis an economically important crop.
Three varieties of cannabis have always been distinguished:
- Cannabis sativa L
- C. indica
- C. ruderalis
The varieties that are cultivated for the production of buds are hybrids between these varieties.
How to start?
Before starting with the cultivation of Cannabis, you should consider what you want and everything that is possible. You must determine, for example, investment in material and accessories for cultivation (e.g. seeds, electricity, lamps or ventilation).
Are you going to grow indoors or outdoors? What variety do you want to cultivate and what crop do you want? What basic materials are you going to use? How much surface area do you have available for cultivation? How many plants per square metre? What means of growth are you going to use? There are many things to keep in mind and that are directly related to each other. If you consider these points first, your goals will be more realistic and you can avoid unpleasant surprises.
Seeds
Normally you buy seeds when you decide to select a mother plant for removing cuttings. It is important that you choose a healthy seed. The healthy seed is hard and smooth. Sterile or immature seeds are pale and matte. In the Netherlands, they sell so-called hybrid seeds. Hybrids are crosses between the various cannabis strains. If these hybrids cross each other they usually form plants that cannot be cultivated. Keep in mind that half of the of the seeds will grow male plants. Males do not produce buds and, in addition, fertilize the females, which makes the quality of buds a lot worse. There are several was to germinate the seeds, but it is best to do it inside the house because the environment is more protected. Before a seed can germinate, it has to absorb water. Then, the biological processes within the seed start, and finally it ends up germinating.
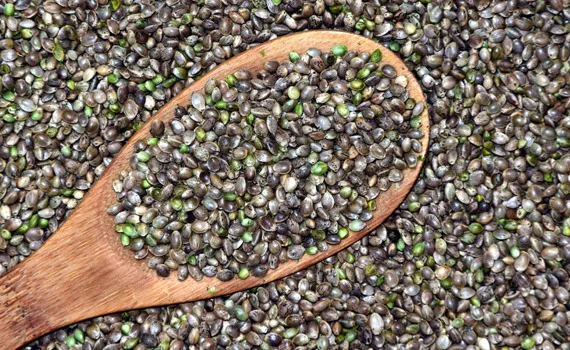
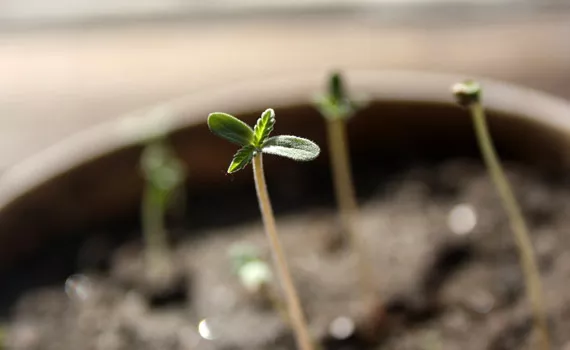
A good way to do it is to place the seed in a glass of mineral water. When you see the tip of the root emerging, you place the seed in a damp paper towel. The time it takes for the tip of the root to appear depends heavily on the variety and age of the seed. Make sure the seeds have enough space between each other for aeration. This way, you avoid mould formation. After a few days, the seeds are ready to be planted in the middle of the selected growth area. Place them 5 mm below the surface. Make sure that the humidity of the air is sufficiently high, but also in this situation you must prevent the environment around the seeds from becoming too wet. That's why you shouldn't give the plant too much water. When the first true leaves appear, also called cotyledons, on your plants, you can start adding the fertilizer.
The concentration of fertiliser must not be too high; it is advisable to have a maximum concentration of 1.2, according to the concentration of the water. Maintain the temperature between 20 and 25°C. The optimal air humidity for this period ranges from 60-70%. The development of the plants does not depend solely on the fertilizer, the spectrum of the grow lamps is also very important. The blue spectrum, for example, makes young plants grow better horizontally, rather than vertically. In this way, the plants will already be strong when the flowering phase begins. When we develop the plants in a space that is different from the space where they flower, it's called pre-growth. In this way, plants grow stronger and root faster and the flowering can happen right away. Other advantages are that there will be fewer losses and they can be harvested more frequently. For pre-growth, fluorescent lamp tubes are generally used. This lighting is economical and easy to handle. Another advantage is that these types of lamps can be a short distance from the plants, so it is not necessary to have lots of space and expensive facilities.
ADVICE: Over time, the reflectors of the lamps get dirty. For this, make sure to clean them frequently. Studies have shown that the light performance can diminish by 20% very quickly!
Cuttings
Working with cuttings instead of seeds has several advantages. First, the plants have already grown a bit, and not only are they stronger, but you'll also be able to harvest sooner. Plus, you know more about the plant because it's genetically identical to the mother plant from which the cuttings have been taken. You are, then, certain that you have a female plant, with an excellent performance and a great quality likely. If you have a good mother plant, you can also take the cuttings yourself. Take cuttings from the young and vital parts of the plant. Cut a piece from 5-15 cm above the axillary bud of a branch with a thickness of 2 to 5 mm.
Make sure that the cuttings do not have too many leaves, to prevent it from drying too quickly (without roots it is difficult to absorb water). Cut off the large leaves and make sure the cuttings have the appearance of a young plant. Cut the stem diagonally, to increase the surface of the cut.
If the cuttings are not to be planted immediately in a growing container, it is advisable to put it in a glass of water in the meantime. This way, you don't just prevent it from drying out, but also from absorbing bubbles in the stem that can block the sap.; Smear the end of the stem with powder/rooting gel and shake it lightly. Make sure that the growing medium is moist. Place the growing container in an enclosed space (e.g. mini a greenhouse) and sprinkle some water on it. Make sure that the humidity of the air is not (continuously) too high. After 1 to 2 weeks the first roots appear. The cuttings are now small plants and can be transplanted to another container with more room to grow.
ADVICE: If you are trying to get a good quality mother plant through seeds, but you're not sure if it's female, you'll be able to determine it by means of a cutting. Put this cuttings aside and force it to bloom by reducing the number of hours from 18 to 12 h per day. Female plants are recognized by the pistils (the preflores), while that the male flowers are "little balls."
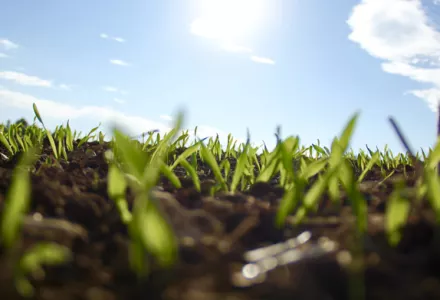
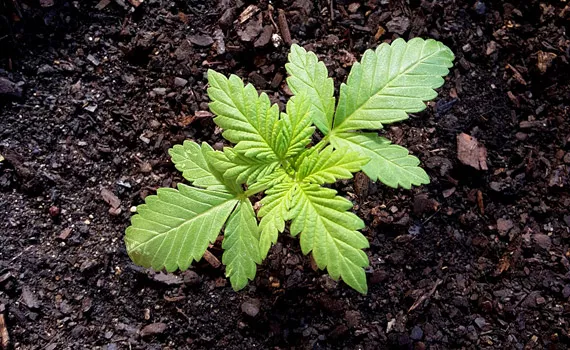
Growth
When the plant has developed enough roots, the growth phase begins. A plant grows because the cells at the points of growth are divided and then they fill with water. The plant now consumes a lot of water and nutrients (especially nitrogen). The plant needs a lot of light to be able to optimally use these nutrients and water, that is, to carry out photosynthesis. Although the plant is still growing when it begins to blossom, many growers let the plants grow beforehand. The more time this pre-creation period takes, the longer until it can be harvested. However, the plant will have more time to branch out and it will be less sensitive to disease or defects, and in turn will generate a better result.
The flowering
At a certain point a transformation in the plant will take place without this being visible on the exterior. The transformation to the phase of flowering is when the plants develop the first cells that later will form flowers. This transformation occurs in cannabis when the days get shorter and shorter. If you grow indoors, you can determine for yourself the moment of this transformation by reducing the hours of light to 12 hours. The light becomes reddish in appearance, like sodium lamps; This transformation is also an influence and stimulates vertical growth and the root development of plants. These lamps have to be hung, however, at a greater distance from the plants, because they emit more heat. Many times they are used in combination with other lamps. In this phase, you must not interrupt the plant during the period of darkness because this will prolong the period of flowering.
It is advisable to maintain the indoor air humidity below 60% to avoid mould formation and rotting of the buds. But, nevertheless, it is preferable to maintain the level above 50% humidity to prevent it from being infested with red spider mites. Now that the plant has moved into the flowering phase, which lasts a minimum of 2 months, its alimentary needs also change. The demand for nitrogen (N), which the plant had especially in the growth phase, decreases and the demand for potassium (K) and fossil- forum (P) increases substantially. 1-2 weeks before harvest, when the plant begins to mature, you must stop adding fertilizer.
It is very important that the buds are not fertilized, so that they do not form seeds, because the plant has a tendency to use all their energy on seeds. Take off the shaded flowers, because these are not going to produce practically anything and absorb the energy of the big buds. Never take off the shaded leaves. These generate the energy that the buds need to develop.
As soon as the plant begins to mature, the pistils become brown. When 75% of them are brown, the plant is ready to be harvested. The timing of the harvest is also recognizable through other factors: the leaves become yellow and resin balls appear, visible to the naked eye. Harvest, in any case, when you see that these little balls turn amber-colored.
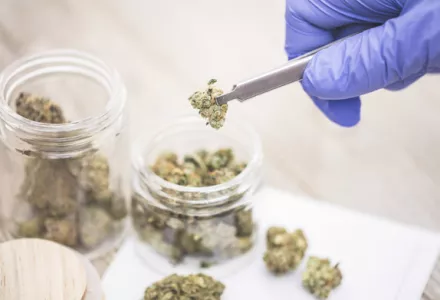
The harvest
After all the care that you've given your plant, the time has now come to harvest it. This is done by cutting the stem from underneath. Dry the plant for two weeks, hanging it upside down in a dark and dry place. Keep in mind that in a humid place, like a basement, there's a greater risk of mould forming. Leave the leaves on the plant. This is so the plant can transform the maximum amount of chlorophyll into sugars. As soon as the plant is dry, you can take off the buds. When doing this, try to lose the minimum amount of of resin possible. When you've finished, you can cut the leaves from the buds. Save the buds in a closed container and in a dark place.