Before starting to grow indoors you really do need to think about what you want and above all about what’s possible. Things you need to think about include how much to invest in plant materials and cultivation equipment such as plant food, lamps and ventilation. Do you want to grow indoors or outdoors? Which plant/variety do you want to use and what kind of yields/crop do you have in mind? What stock material are you going to use? How much space do you have available for the crop? How many plants per square foot/ meter? Which growing medium are you going to use?
There are quite a few points you need to think about and they’re all interconnected. Give it a bit of thought so that whatever you choose will be more realistic and there’s a better chance you won’t find yourself facing unpleasant surprises.
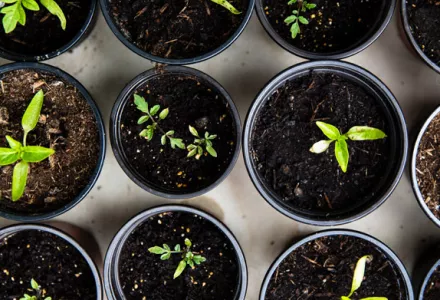
Seeds
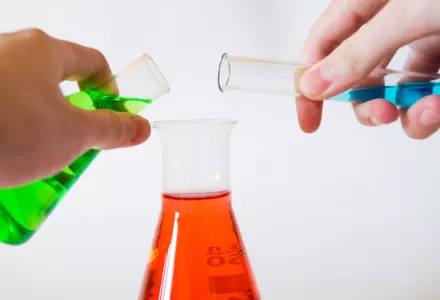
There are two main ways to produce a crop, from seed or from cuttings. Cuttings stay true to form were seeds can experience variability. Seeds are sometimes chosen as a start for the stock plants from which future cuttings will be taken. Always use the freshest, highest quality seeds.
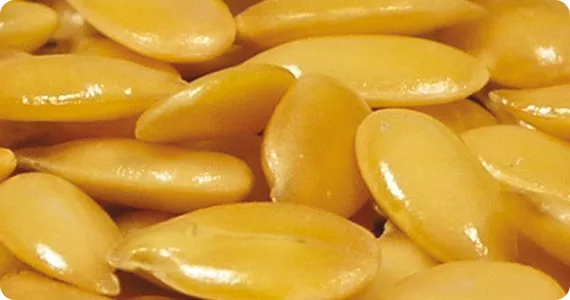
Some seeds are known as hybrid seeds. Hybrids are a cross between two varieties (cultivars, sub-species, etc) of the same species of plant. If these F1 hybrids are then cross-bred again, you often get plants that are totally different than the desired F1 hybrid, sometimes reverting back to the original parental varieties.
There are a number of ways of getting seeds to germinate, but you’re best off doing that indoors because that’s where the environment is better protected. A seed needs to absorb water before it can germinate. After this imbibing of water, biological processes get to work inside the seed and it comes, as it were, to life.
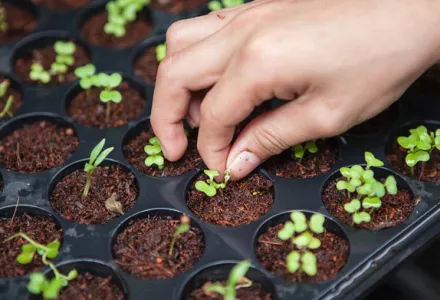
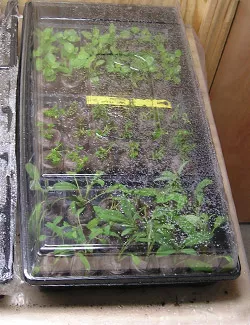
A simple method of germinating seed is to place the seed on a piece of paper towel that is wet. Cover the seed and store in a dark place. Make sure the towel remains moist but the seed does not drown in a puddle of water (seeds need oxygen to germinate). How long it takes before the seed starts to sprout varies per variety and depends on the age of the seed. Make sure the seeds are adequately ventilated to avoid disease issues. Once the root sprouts and the new top shows, transfer to a seedling medium in a small container.
When transplanting, place the sprouted now seedlings 2.5 times the seed height under the surface (e.g. If seed is 2mm place 5mm under the surface). Make sure the moisture is sufficiently high, but remember too that the area around the seeds mustn’t be too damp. So go easy on the watering.
When the first real leaves appear on your plants you can start giving some fertilizer. The fertilizer concentration mustn’t be too high: use about one half to two thirds strength fertilizer. Keep the temperature between 20°C and 25°C. Ideal humidity at this stage is between 70% and 90%.
The light spectrum the plant sees also has a considerable influence on the way your plants grow. The blue part of the spectrum is what gets the plants to grow widthways rather than tall. This allows you to get robust plants before they start to flower. We call it vegetative growing (vegging) if you start growing plants in one area or under a different light spectrum before moving them into another area, or changing the light spectrum, to flower. Again, this encourages robust plants that pick up strength faster and that can be readied for flowering straight away. Other advantages include less waste and more frequent harvesting. You normally use fluorescent lighting in the seedling stage. This light is easy and inexpensive and a further advantage is that the lamps can be set close to the plants so you don’t need much room.
The reflectors for your lighting get dirty as time goes by. Clean them regularly. Research shows that light yields drop by 20% pretty quickly!
Cuttings
Using cuttings instead of seeds has a number of advantages. First of all the plants have already grown a bit, which means that they’re not just stronger but you can harvest them earlier. You’ll also know more about your plant, because genetically it’s identical to the stock plant from which the cutting has been taken.
If you have a good stock plant of your own you can take cuttings yourself. Take cuttings from young, vigorous parts of the plant. Use a tip or leaf/ bud cutting that’s between 5 cm and 15 cm long just above an axillary bud where the stem has the right carbohydrate concentration. The cutting shouldn’t have too much leaf area because otherwise it’ll dry out too quickly – it can’t absorb water easily without roots. Remove any excessively large leaves so that the cutting looks like a small plant.
Cut the stem straight across. Diagonal cuts, while great for taking up water in cut flowers, allows more wound area for disease. It also takes longer to seal. Allow the cut to dry a little before transferring to the rooting medium. It won’t dehydrate if you keep the air humidity around 100%. You can also dip the end of the cutting in rooting powder/liquid, making sure to get rid of any excess. Ensure that the growing medium is nice and damp. Place the growing medium in a closed off area, a seed box say, and start giving it some water as a fine spray. Start out with the humidity around 100% until the cut begins to callus, then allow the humidity levels to stay a little lower but just above the point where the leaves begin to wilt.
After a few days to a few weeks, depending on the variety, the first little roots start appearing. The cuttings have now turned into little plants and are ready to be transferred to another medium with more space for growth.
Tip female plants?
Some plants have different male and female flowers or the plants are either male or female, like cucumbers or the hops you need for brewing your own beer. If you’ve grown a healthy plant from seed but you’re not sure whether it’s male or female, you can take a cutting to find out. Place the cutting apart and force it to flower by changing the photoperiod or the duration of light it receives daily. Some plants need long days to flower, some short days, and others do not flower on photoperiod changes. See if it will start to flower!
Growth
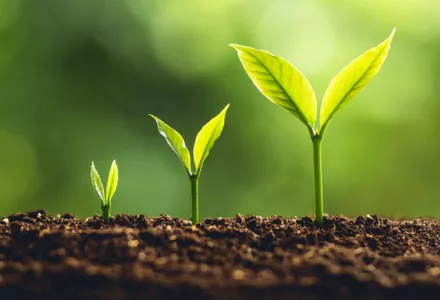
When your plant has thrown out enough roots it starts to grow. A plant grows because the cells in the growth areas divide and because the cells that have already formed swell up with water. The plant is now using a lot of water and nutrients, above all nitrogen.
Although the plant continues to grow when it comes into bloom, many growers incorporate a vegetative growth phase first. The longer this period lasts, the longer it takes before any harvesting. However, on the other hand, the plant has much more time to develop branches; this increases its resistance to disease and defects, and also provides a bigger crop later. Allowing your plants a least a one week veg phase will make them strong and robust.
Flowering
Even before there’s anything visible on the outside of the plant, at a certain point a change starts to take effect within the plant. This is the switch that marks the start of the flowering phase; the first cells are formed that later make up the flowers. In some plants this switch is activated by the days growing shorter or longer. If you’re growing indoors you can decide yourself when the switch will happen by changing the hours of light. Light that is more to the red end of the spectrum, such as light from sodium lamps, stimulates longitudinal growth and root development. These lamps may need to be suspended at a greater distance from the plants because they give out more heat. Many growers use combinations of lamps. During this period you need to make sure the plant remains undisturbed when in the dark period because this will extend the flowering period.
It is a good idea to keep the humidity (around the flowers) at below 60% to prevent fungi such as Botrytis taking hold in the fruits or flowers. But it’s best to keep it above 50% to avoid spider mite.
Now that the plant has moved into the flowering phase, the plant’s nutritional requirements change. Its need for nitrogen (N), which was the primary nutrient during the growing phase, comes down but its need for potassium (K) and phosphorus (P) rises markedly. Stop giving fertilizer between 3 – 7 days before the harvest, as the plant’s ripening process nears completion.
You can remove flowers in the shade because these are virtually worthless; they just siphon off energy from the main crop. However, never remove any leaves that are shaded. These still generate the energy the flowers need for their development.
When your crop is ready for harvest depends on the crop grown. Often crops are harvested too early. Affecting yield, taste and flavours! Know when to harvest.